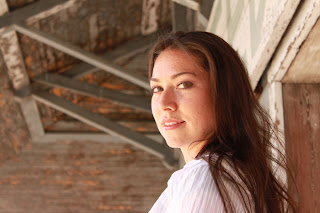
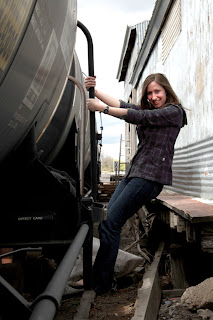
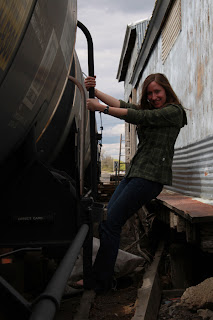
On my enhancement, I picked my favorite pictures that did not have very good lighting so I could challenge myself and improve my editing skills. The first photo, Amy, I first added an Adjustment Levels layer to bump up the contrast and darken the mid tones. I then used the Stamp tool, the Brush, and the Blur tool to clean up and soften her skin. I then selected her eyes and used the Levels tool to brighten them. I then lower the saturation to the whole photo. The second photo, I applied a Match Color to the photo, I choose another photo that had better coloring and applied it to this photo. I soften and cleaned up the skin the same way as the previous photo. I lowered the opacity a little on the Match Color layer. The final photo, Emily, I first lighten her face up in Camera Raw. Then I brought her into Photoshop and used an Adjustment Layer Levels to lighten the whole photo. I did not need to do any enhancements to her face, Emily’s skin turned our flawless. I did change the color of her coat, but selecting it and applying a color replacement under the Image menu. It was a challenge working with these three photo and trying to work around the picture quality, but I learned a lot in the process.
Amy
Original
Date: 5-21-2011; Rexburg, Idaho; F-Stop: 5.6; Shutter Speed: 1/200; Focal Length: 55.0 mm; Model: Canon EOS REBEL T1i
Emily (Color Replacement)
Original
Date: 5-21-2011; Rexburg, Idaho; F-Stop: 11.0; Shutter Speed: 1/250; Focal Length: 55.0 mm; Model: Canon EOS REBEL T1i


 Follow
 My name is Julie Peterson. I have a passion for photography. I have four years of experience and have explored many different areas of Photography. I started out as a natural light photographer and just last year added lighting to my skill set. I love to take pictures of nature and create art, but portraits are my strength. I am contently challenging myself to be better and more creative. Feel free to comment on my page and send me feedback.
Was this fun to shoot? Looks like it could have been a good time. I liked your enhancements! Amy is obviously a beautiful girl, but you gave her a nice finishing touch. You did a nice job adding light onto Emily’s face. Your photos were fun to look at!