Levels
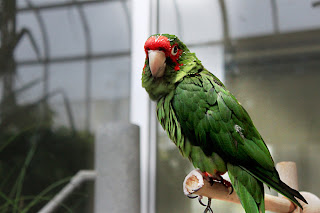
Original
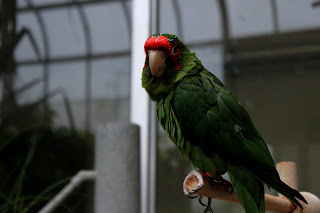
Adjustment Layer
Date: 5-06-2011; Rexburg, Idaho; F-Stop: 5.7; Shutter Speed: 1/2700; Focal Length: 55.0mm; Model: Canon EOS REBEL T1i
For this photo I purposely focused on a lot of light before I captured the shot, so it would show up darker and I could edit it in Photoshop. I used a large aperture to put direct focus on the parrot and blur the background. I brought this photo into Photoshop and used an adjustment layer (non destructive editing). I used the Levels Tool and lightened the whole picture, added contrasts and lightened the midtones. I really wanted the parrot to pop, so I decided to use the “free” mask to bring back the dark in the background. I lowered to opacity so I would not make it as dark as the original was, but enough that parrot would pop.
Crystilized
Original
Smart Filter
Date: 5-06-2011; Rexburg, Idaho; F-Stop: 5.6; Shutter Speed: 1/1000; Focal Length: 55.0mm; Model: Canon EOS REBEL T1i
I used a large aperture to put direct focus on the flowers and blur the background. I brought this photo into Photoshop and used an adjustment layer, the Levels Tool. I lightened the picture, added contrasts and darkened the midtones. I converted the photo to a smart object. I applied a filter to the photo, the Crystalized filter. I really wanted the flower in the middle to be sharp, so I decided to use the “free” mask to bring back the original photo, but just the flower in the front.


 Follow
 My name is Julie Peterson. I have a passion for photography. I have four years of experience and have explored many different areas of Photography. I started out as a natural light photographer and just last year added lighting to my skill set. I love to take pictures of nature and create art, but portraits are my strength. I am contently challenging myself to be better and more creative. Feel free to comment on my page and send me feedback.